
Redmine 6を自力で構築する
この記事では、2025年2月時点において最新のRedmine 6を構築する手順について紹介します。
Redmineは、オープンソースのプロジェクト管理ツールで、2006年に初版がリリースされました。現在も公式サイト(Redmine.org)を通じて、ボランティア開発者コミュニティによるバグ修正や機能追加が行われています。
RedmineはWindowsでも利用可能で、以前はBitnamiという企業からRedmineのパッケージインストーラーが無償で提供されていました。しかし、2019年にBitnamiがVMwareに買収された後、2022年10月18日のRedmine 5.0.3が最終リリースとなり、その時点でOS X、Windows、およびLinux向けのインストーラーのサポートが終了しました。
また、2022年11月30日以降、BitnamiはLinuxベースの仮想マシンやクラウド環境向けのパッケージに注力しており、Windows用の最新インストーラーの提供予定はない状況です。
Windows版でReadmineを利用していたプロジェクトにとっては、チームの持続可能性に対するとても重大な問題です。
そこで今回は、Redmine 6と関連パッケージを自力でインストールして構築していきます。
今回の環境は以下のとおりです。
| OS | Red Hat Enterprise Linux release 8.10 (Ootpa) |
| コンテナツール | podman version 4.9.4-rhel |
| Redmine | Redmine 6.0.3 (2025-01-29) |
| データベースサーバ | PostgreSQL 16.8 |
| プログラミング言語 | Ruby 3.3.5 |
| ウェブアプリケーションフレームワーク | Rails 7.2.2.1 |
公式サイト(Redmine.org)によると、Redmine 6.0は、Ruby 3.1、3.2、3.3、Rails 7.2をサポートしています。PostgreSQLは14のみとなっていますが、今回は動作確認も踏まえてPostgreSQL 16を利用していきます。
目次
Redmine 6を自力で構築する
ここからは、RHEL8のポッドマネージャを利用してコンテナ上にRedmineサーバを構築してく手順を紹介していきます。コンテナを利用せず、物理サーバに直接構築する場合も参考なると思います。
ベースコンテナイメージの作成
はじめに、Redmineサーバを作成するためのベースとなるコンテナイメージを作成します。
コンテナイメージは、RHEL8サーバとして最低限動作するようにRPMパッケージをあらかじめインストールしておきます。
# vi ContainerfileFROM registry.redhat.io/ubi8/ubi:latest
USER root
RUN echo root:root1234 | chpasswd
RUN dnf -y install openssh-server; dnf -y install openssh-clients
RUN dnf -y install rsyslog
RUN dnf -y install firewalld
RUN dnf -y install hostname
RUN dnf -y install procps
RUN dnf -y install diffutils
RUN dnf -y install wget
RUN dnf -y groupinstall "Development Tools"
RUN dnf -y install git
RUN dnf -y install maven
RUN dnf -y install passwd
RUN dnf -y install httpd; dnf -y install httpd-devel
RUN dnf clean all
RUN echo "Port 2222" >> /etc/ssh/sshd_config
RUN systemctl enable rsyslog
RUN systemctl enable firewalld
CMD [ "/sbin/init" ]rootのパスワードは任意に設定してください。ファイルを作成したらコンテナイメージを作成します。
# podman build -t redmine_server:0.0.0 .ベースコンテナイメージが作成されたか確認します。
# podman images

REPOSITORY                   TAG                    IMAGE ID      CREATED        SIZE
localhost/redmine_server     0.0.0                  27c27a8e14ea  2 hours ago   2.61 GB
作成したコンテナを起動してログインします。コンテナはデータの永続化についての考慮が必要です。今回は、RedmineとPostgreSQLに関連する以下のディレクトリをバインドして永続化していきます。
- /usr/src/redmine ⇒ Redmineに保存されたファイルなどを格納する場所
- /var/lib/pgsql ⇒ PostgreSQLサーバのデータ領域などを格納する場所
# podman run --privileged -itd  --rm -v /var/opt/redmine/usr/src/redmine:/usr/src/redmine -v /var/opt/redmine/var/lib/pgsql:/var/lib/pgsql --net local_macvlan_net --ip=192.168.11.10 --name redmine_server -h redmin.test.local localhost/redmine_server:0.0.0 /sbin/init

#podman ps

CONTAINER ID  IMAGE                           COMMAND     CREATED        STATUS        PORTS       NAMES
f1f4ea1f663a  localhost/redmine_server:0.0.0  /sbin/init  7 seconds ago  Up 7 seconds              redmine_server
Podmanの仮想ネットワークやボリュームについては、以下で詳しく解説しています。
作成したコンテナイメージにログインして作業を進めていきます。
# podman exec -it <Container ID> /bin/bashコンテナにログインしたら、外部から接続できるようにSSH(2222)ポートとhttp(80)ポートを開放していきます。
# firewall-cmd --add-port=2222/tcp --zone=public --permanet
# firewall-cmd --add-service=http --zone=public --permanet
# firewall-cmd --reload
これで、外部から2222ポートを使ったSSH接続とHTTP接続ができるようになりました。
Postgresql 16のインストールと基本設定
コンテナで作成したサーバにPostgreSQL 16のインストールと基本設定を行います。
はじめに必要なパッケージを追加します。
# dnf groupinstall "Development Tools"

# dnf install gcc-c++ patch readline openssl-devel zlib zlib-devel libyaml-devel make bzip2  autoconf automake libtool bison sqlite-devel  readline-devel zlib-devel curl-devel libffi-devel wget
構築に必要なパッケージのインストールが完了したら、PostgreSQLサーバをインストールします。
# dnf module list postgresql

Updating Subscription Management repositories.
Unable to read consumer identity
subscription-manager is operating in container mode.

This system is not registered with an entitlement server. You can use subscription-manager to register.

Last metadata expiration check: 22:34:31 ago on Sun Feb 23 07:06:47 2025.
Red Hat Enterprise Linux 8 for x86_64 - AppStream (RPMs)
Name                 Stream           Profiles                    Summary
postgresql           9.6              client, server [d]          PostgreSQL server and client module
postgresql           10 [d]           client, server [d]          PostgreSQL server and client module
postgresql           12               client, server [d]          PostgreSQL server and client module
postgresql           13               client, server [d]          PostgreSQL server and client module
postgresql           15               client, server [d]          PostgreSQL server and client module
postgresql           16               client, server [d]          PostgreSQL server and client module

Hint: [d]efault, [e]nabled, [x]disabled, [i]nstalled

# dnf module install postgresql:16
# dnf install postgresql-devel
Postgresql 16のインストールが完了したら、データベースへの接続設定を変更して、パスワード認証でデータベースに接続できるようにします。
# vi /var/lib/pgsql/data/pg_hba.conf

【変更前】
# "local" is for Unix domain socket connections only
local   all             all                                     peer
# IPv4 local connections:
host    all             all             127.0.0.1/32            ident
# IPv6 local connections:
host    all             all             ::1/128                 ident

【変更後】
# "local" is for Unix domain socket connections only
local   all             all                                     peer
# IPv4 local connections:
host    all             all             127.0.0.1/32            md5
# IPv6 local connections:
host    all             all             ::1/128                 md5
次にデータベースの初期化を実行してデータベースを起動します。
# /usr/bin/postgresql-setup --initdb
# systemctl enable postgresql.service
# systemctl start postgresql.service
# systemctl status postgresql

● postgresql.service - PostgreSQL database server
   Loaded: loaded (/usr/lib/systemd/system/postgresql.service; enabled; vendor >
   Active: active (running) since Mon 2025-02-24 05:52:10 UTC; 34s ago
  Process: 31 ExecStartPre=/usr/libexec/postgresql-check-db-dir postgresql (cod>
 Main PID: 40 (postgres)
    Tasks: 7 (limit: 50349)
   Memory: 25.6M
   CGroup: /machine.slice/machine-libpod_pod_bdad3dfd3638045d36c6b5188c4a45fd11>
           tq 40 /usr/bin/postgres -D /var/lib/pgsql/data
           tq 68 postgres: logger
           tq 69 postgres: checkpointer
           tq 70 postgres: background writer
           tq287 postgres: walwriter
           tq288 postgres: autovacuum launcher
           mq289 postgres: logical replication launcher

Feb 24 05:52:09 redmin.reafnex.local systemd[1]: Starting PostgreSQL database s>
Feb 24 05:52:09 redmin.reafnex.local postgres[40]: 2025-02-24 05:52:09.781 UTC >
Feb 24 05:52:09 redmin.reafnex.local postgres[40]: 2025-02-24 05:52:09.781 UTC >
Feb 24 05:52:10 redmin.reafnex.local systemd[1]: Started PostgreSQL database se
PostgreSQLサーバが起動したら、Redmineが利用するロールとデータベースを作成します。ロールのパスワードは任意に設定してください。
# su postgres
bash-4.4$ psql
psql (16.8)
Type "help" for help.

postgres=# CREATE ROLE redmine LOGIN ENCRYPTED PASSWORD 'redmine1234' NOINHERIT VALID UNTIL 'infinity';
postgres=# CREATE DATABASE redmine WITH ENCODING='UTF-8' OWNER=redmine;
ロールとデータベースを設定したら「Ctrl + D」で一度抜けたのち、作成したロールとパスワードでデータベースに接続できるか確認します。
# psql -U redmine -d redmine -h localhost -W
Password:
psql (16.8)
Type "help" for help.

redmine=> \l
                                                   List of databases
   Name    |  Owner   | Encoding | Locale Provider | Collate | Ctype  | ICU Loca
le | ICU Rules |   Access privileges
-----------+----------+----------+-----------------+---------+--------+---------
---+-----------+-----------------------
 postgres  | postgres | UTF8     | libc            | C.utf8  | C.utf8 |
   |           |
 redmine   | redmine  | UTF8     | libc            | C.utf8  | C.utf8 |
   |           |
 template0 | postgres | UTF8     | libc            | C.utf8  | C.utf8 |
   |           | =c/postgres          +
           |          |          |                 |         |        |
   |           | postgres=CTc/postgres
 template1 | postgres | UTF8     | libc            | C.utf8  | C.utf8 |
   |           | =c/postgres          +
           |          |          |                 |         |        |
   |           | postgres=CTc/postgres
(4 rows)

redmine=>
PostgreSQLのデータベースへ作成したロールとパスワードで接続できることが確認できたら、Redmineで利用できる環境が整ったことになります。
RubyとRailsのインストール
ここからは、RubyとRailsをインストールしていきます。
# dnf module list ruby

Not root, Subscription Management repositories not updated
No read/execute access in current directory, moving to /
Extra Packages for Enterprise Linux 8 - x86_64  8.1 MB/s |  14 MB     00:01
Red Hat Enterprise Linux 8 for x86_64 - AppStre  23 MB/s |  71 MB     00:03
Red Hat Enterprise Linux 8 for x86_64 - BaseOS   29 MB/s |  82 MB     00:02
Red Hat Universal Base Image 8 (RPMs) - BaseOS  3.4 MB/s | 723 kB     00:00
Red Hat Universal Base Image 8 (RPMs) - AppStre  14 MB/s | 3.4 MB     00:00
Red Hat Universal Base Image 8 (RPMs) - CodeRea 1.2 MB/s | 186 kB     00:00
Last metadata expiration check: 0:00:01 ago on Mon Feb 24 06:10:04 2025.
Red Hat Enterprise Linux 8 for x86_64 - AppStream (RPMs)
Name Stream  Profiles       Summary
ruby 2.5 [d] common [d]     An interpreter of object-oriented scripting language
ruby 2.6     common [d]     An interpreter of object-oriented scripting language
ruby 2.7     common [d]     An interpreter of object-oriented scripting language
ruby 3.0     common [d]     An interpreter of object-oriented scripting language
ruby 3.1     common [d]     An interpreter of object-oriented scripting language
ruby 3.3 [e] common [d]     An interpreter of object-oriented scripting language

Red Hat Universal Base Image 8 (RPMs) - AppStream
Name Stream  Profiles       Summary
ruby 2.5 [d] common [d]     An interpreter of object-oriented scripting language
ruby 2.6     common [d]     An interpreter of object-oriented scripting language
ruby 2.7     common [d]     An interpreter of object-oriented scripting language
ruby 3.0     common [d]     An interpreter of object-oriented scripting language
ruby 3.1     common [d]     An interpreter of object-oriented scripting language
ruby 3.3 [e] common [d]     An interpreter of object-oriented scripting language

Hint: [d]efault, [e]nabled, [x]disabled, [i]nstalled

# dnf module install ruby:3.3
# dnf install ruby-devel

# ruby -v
ruby 3.3.5 (2024-09-03 revision ef084cc8f4) [x86_64-linux]
次にRailsをインストールします。
# gem update --system
# gem install bundler
# gem install rails -v 7.2.0

# rails -v
Rails 7.2.2.1
これで、RubyとRailsのインストールが完了しました。
Redmine 6のインストール
いよいよ、Redmine 6本体をインストールしていきます。
Redmineでは、イメージ画像を取り扱うためImagemagicを利用していますので、インストールしていきます。
# dnf install  https://dl.fedoraproject.org/pub/epel/epel-release-latest-8.noarch.rpm
# dnf install ImageMagick ImageMagick-devel
次にRedmine 6本体をダウンロードし、インストール先に展開します。ディレクトリをリネームし、パスが/opt/redmineとなるようにします。
# cd /opt
# wget https://www.redmine.org/releases/redmine-6.0.3.tar.gz
# tar -zxvf redmine-6.0.3.tar.gz
# mv redmine-6.0.3 redmine
# cd redmine
RedmineをPostgreSQLのデータベースに接続させるための設定を行います。
cd /opt/redmine/config
cp -p database.yml.example database.yml
vi database.yml
production部分に対して、先ほど構築したPostgreSQLのロールとパスワードを設定します。developmentとtestは利用しないため、すべてコメントアウトしてください。
# Default setup is given for MySQL 5.7.7 or later.
# Examples for PostgreSQL, SQLite3 and SQL Server can be found at the end.
# Line indentation must be 2 spaces (no tabs).

production:
  adapter: postgresql
  database: redmine
  host: localhost
  username: redmine
  password: "redmine1234"
  # Use "utf8" instead of "utfmb4" for MySQL prior to 5.7.7
  encoding: utf8
  variables:
    # `READ-COMMITTED`.
    # In case of MySQL lower than 8, the variable name is `tx_isolation`.
    # See https://www.redmine.org/projects/redmine/wiki/MySQL_configuration
    transaction_isolation: "READ COMMITTED"

#development:
#  adapter: mysql2
#  database: redmine_development
#  host: localhost
#  username: root
#  password: ""
#  # Use "utf8" instead of "utfmb4" for MySQL prior to 5.7.7
#  encoding: utf8mb4
#  variables:
#    transaction_isolation: "READ-COMMITTED"

# Warning: The database defined as "test" will be erased and
# re-generated from your development database when you run "rake".
# Do not set this db to the same as development or production.
#test:
#  adapter: mysql2
#  database: redmine_test
#  host: localhost
#  username: root
#  password: ""
#  # Use "utf8" instead of "utfmb4" for MySQL prior to 5.7.7
#  encoding: utf8mb4
#  variables:
#    transaction_isolation: "READ-COMMITTED"

# PostgreSQL configuration example
#production:
#  adapter: postgresql
#  database: redmine
#  host: localhost
#  username: postgres
#  password: "postgres"

# SQLite3 configuration example
#production:
#  adapter: sqlite3
#  database: db/redmine.sqlite3

# SQL Server configuration example
#production:
#  adapter: sqlserver
#  database: redmine
#  host: localhost
#  username: jenkins
#  password: jenkins
RubyGemを使って、Redmineを構築するためのRuby on Railsの環境を構築します。
# cd /opt/redmine
# vi Gemfile
Gemfileファイルにpumaとostructを追記して、Ruby on Railsの環境に含めるように設定します。
source 'https://rubygems.org'

ruby '>= 3.1.0', '< 3.4.0'

gem 'rails', '7.2.2.1'
gem 'rouge', '~> 4.5'
gem 'mini_mime', '~> 1.1.0'
gem "actionpack-xml_parser"
gem 'roadie-rails', '~> 3.2.0'
gem 'marcel'
gem 'mail', '~> 2.8.1'
gem 'nokogiri', '~> 1.16.0'
gem 'i18n', '~> 1.14.1'
gem 'rbpdf', '~> 1.21.3'
gem 'addressable'
gem 'rubyzip', '~> 2.3.0'
gem 'propshaft', '~> 1.1.0'
gem 'rack', '>= 3.1.3'
gem 'puma'
gem 'ostruct'
RedmineのRuby on Railsの環境を作成します。
# bundle config set --local without 'development test'
# bundle install
Railsアプリケーションで秘密鍵を生成します。Railsアプリケーションは、セッションハイジャックに対する対策が強化されています。
# bundle exec rake generate_secret_tokenPostgreSQLのデータベースにRedmineが使用するテーブルを作成します。
# RAILS_ENV=production bundle exec rake db:migrateRailsのアプリケーションサーバ(Puma)の起動方法について設定します。
# vi /opt/redmine/config/puma.rbdirectory '/opt/redmine'
environment 'production'
bind 'tcp://0.0.0.0:3000'
workers 2
threads 1,6
stdout_redirect 'log/puma.stdout.log', 'log/puma.stderr.log', true
pidfile 'tmp/puma.pid'
state_path 'tmp/puma.state'
activate_control_app最後に、アプリケーションサーバ(Puma)をsystemdで起動するように設定します。
# vi /etc/systemd/system/puma.service[Unit]
Description=Puma HTTP Server for Redmine
After=network.target
[Service]
Type=simple
User=root
WorkingDirectory=/opt/redmine
Environment=RAILS_ENV=production
ExecStart=/usr/local/bin/bundle exec puma -C /opt/redmine/config/puma.rb
Restart=always
[Install]
WantedBy=multi-user.targetプリケーションサーバ(Puma)を起動します。
# systemctl daemon-reload
# systemctl enable puma
# systemctl start puma
# systemctl status puma
● puma.service - Puma HTTP Server for Redmine
Loaded: loaded (/etc/systemd/system/puma.service; enabled; vendor preset: di>
Active: active (running) since Mon 2025-02-24 05:52:09 UTC; 59min ago
Main PID: 28 (bundle)
Tasks: 25 (limit: 50349)
Memory: 372.3M
CGroup: /machine.slice/machine-libpod_pod_bdad3dfd3638045d36c6b5188c4a45fd11>
tq 28 puma 6.6.0 (tcp://0.0.0.0:3000) [redmine]
tq295 puma: cluster worker 0: 28 [redmine]
mq299 puma: cluster worker 1: 28 [redmine]
Feb 24 05:52:10 redmin.reafnex.local bundle[28]: [28] * Puma version: 6.6.0 ("R>
Feb 24 05:52:10 redmin.reafnex.local bundle[28]: [28] * Ruby version: ruby 3.3.>
Feb 24 05:52:10 redmin.reafnex.local bundle[28]: [28] * Min threads: 1
Feb 24 05:52:10 redmin.reafnex.local bundle[28]: [28] * Max threads: 6
Feb 24 05:52:10 redmin.reafnex.local bundle[28]: [28] * Environment: production
Feb 24 05:52:10 redmin.reafnex.local bundle[28]: [28] * Master PID: 28
Feb 24 05:52:10 redmin.reafnex.local bundle[28]: [28] * Workers: 2
Feb 24 05:52:10 redmin.reafnex.local bundle[28]: [28] * Restarts: (✔) hot (>
Feb 24 05:52:10 redmin.reafnex.local bundle[28]: [28] * Listening on http://0.0>
Feb 24 05:52:10 redmin.reafnex.local bundle[28]: [28] Use Ctrl-C to stop
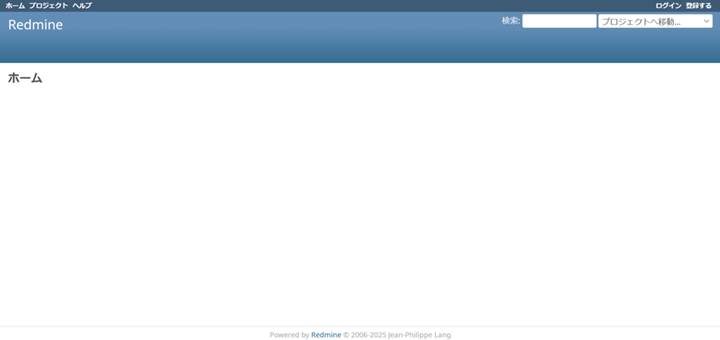
lines 1-21/21 (END)http://<サーバIPアドレス>:3000/にアクセスすると、以下のようなRedmineのトップ画面が表示されます。
初回では、アカウント「admin」、パスワード「admin」で管理者としてログインすることができます。
まとめ
いかがでしたでしょうか。
今回は、RHEL8のベースコンテナイメージを使用して、Redmine 6を構築する手順を紹介しました。コンテナとデータ永続化により、可搬性が確保されるため、Windows版のRedmine提供終了で困っていたチームにも、問題解決の手助けになるのではないでしょうか。
公式サイト(Redmine.org)によると、Redmine 6.0はPostgreSQL 16をサポートしていませんが、今回のトライアルで確認した結果、特に不具合は発生していないため、Redmine 6.0とPostgreSQL 16の組み合わせには問題がないと思われます。
PostgreSQL 16では、並列クエリの改善やインデックススキャンの効率化が行われているため、Redmineの運用におけるパフォーマンスの向上に寄与する可能性があります。
さらに、Redmine 6.0は以前のバージョンに比べて140件近くのバグ修正と改良が加えられており、安定性と利便性が向上しています。ぜひお試しください。
参考になれば幸いです。
システムのお悩みについてご相談ください

SOHOのシステム運用管理に関するお悩みごとについて、なんでもお気兼ねなくご相談ください。
現役システムエンジニアのスタッフが、ボランティアでご相談にご対応させていただきます。